
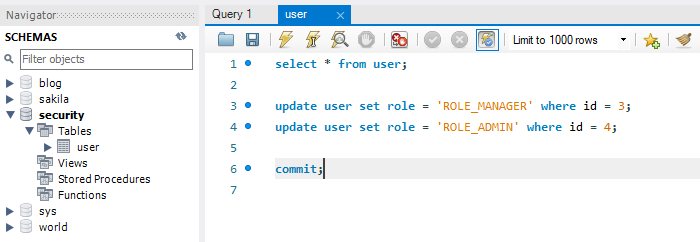
1. admin, manager 계정 만들고 권한 DB에서 바꿔주기

2. SecurityConfig 수정
package com.pure.security.config;

import org.springframework.context.annotation.Bean;
import org.springframework.context.annotation.Configuration;
import org.springframework.security.config.annotation.method.configuration.EnableGlobalMethodSecurity;
import org.springframework.security.config.annotation.web.builders.HttpSecurity;
import org.springframework.security.config.annotation.web.configuration.EnableWebSecurity;
import org.springframework.security.config.annotation.web.configuration.WebSecurityConfigurerAdapter;
import org.springframework.security.crypto.bcrypt.BCryptPasswordEncoder;

@Configuration
@EnableWebSecurity	//스프링 시큐리티 필터 등록
@EnableGlobalMethodSecurity(securedEnabled = true, prePostEnabled = true) //secured 어노테이션, preAuthorize 어노테이션 활성화
public class SecurityConfig extends WebSecurityConfigurerAdapter{

	@Bean
	public BCryptPasswordEncoder encodePwd() {
		return new BCryptPasswordEncoder();
	};

	@Override
	protected void configure(HttpSecurity http) throws Exception {
		http.csrf().disable();
		http.authorizeRequests()
			.antMatchers("/user/**").authenticated()
			.antMatchers("/manager/**").access("hasRole('ROLE_ADMIN') or hasRole('ROLE_MANAGER')")
			.antMatchers("/admin/**").access("hasRole('ROLE_ADMIN')")
			.anyRequest().permitAll()	//위의 세 주소 이외의 나머지는 로그인 없이 접근 가능
			.and()
			.formLogin()
			.loginPage("/loginForm")	 // "/login"주소가 올 때는 로그인 페이지 보여주기
			.loginProcessingUrl("/login") //login 주소가 호출되면 시큐리티가 대신 로그인 진행
			.defaultSuccessUrl("/"); //loginForm에서 로그인을 하면 인덱스로 가지만 특정페이지에서 로그인으로 넘어온 경우에는 로그인 후 이전페이지를 다시 보여줌.
	}
}@EnableGlobalMethodSecurity(securedEnabled=true, prePostEnabled=ture)
==> @Secured 활성화 , @preAuthorize 활성화
3. 컨트롤러 수정
package com.pure.security.controller;

import org.springframework.beans.factory.annotation.Autowired;
import org.springframework.security.access.annotation.Secured;
import org.springframework.security.access.prepost.PreAuthorize;
import org.springframework.security.crypto.bcrypt.BCryptPasswordEncoder;
import org.springframework.stereotype.Controller;
import org.springframework.web.bind.annotation.GetMapping;
import org.springframework.web.bind.annotation.PostMapping;
import org.springframework.web.bind.annotation.ResponseBody;

import com.pure.security.model.User;
import com.pure.security.repository.UserRepository;

@Controller // View를 return 하겠다는 뜻.
public class IndexController {

	@Autowired
	private UserRepository userRepository;

	@Autowired
	private BCryptPasswordEncoder bCryptPasswordEncoder;

	@GetMapping({"","/"})
	public String index() {
		//mustache 기본폴더 src/main/resources/
		//viewResolver 설정: templates(prefix) .mustache(suffix) (기본 설정이기 때문에 .yml에서 생략가능)
		return "index"; //경로 : src/main/resources/templates/index.mustache
	}

	@GetMapping("/user")
	public @ResponseBody String user() {
		return "user";
	}

	@GetMapping("/admin")
	public String admin() {
		return "admin";
	}

	@GetMapping("/manager")
	public String manager() {
		return "manager";
	}

	@GetMapping("/loginForm")
	public String loginForm() {
		return "loginForm";
	}

	@PostMapping("/join")
	public String join(User user) {
		System.out.println(user);
		user.setRole("ROLE_USER");
		String rawPassword = user.getPassword();
		String encPassword = bCryptPasswordEncoder.encode(rawPassword);
		user.setPassword(encPassword);
		userRepository.save(user);
		return "redirect:/loginForm";
	}

	@GetMapping("/joinForm")
	public String joinForm() {
		return "joinForm";
	}

	@Secured("ROLE_ADMIN")
	@GetMapping("/info")
	public @ResponseBody String info() {
		return "개인정보";
	}


	@PreAuthorize("hasRole('ROLE_MANAGER') or hasRole('ROLE_ADMIN')") //함수가 실행되기 전에 권한 필터링
	@GetMapping("/data")
	public @ResponseBody String data() {
		return "data";
	}


}앞에서 활성화한 @Secured("ROLE_ADMIN") -> ADMIN역할을 가진 계정만 해당 주소 접근 가능.
@PreAuthorize -> 해당 함수가 실행되기 전에 권한 필터링 / hasRole 문법을 쓰면 여러개의 권한을 설정 가능.
'취업 준비 > Spring security' 카테고리의 다른 글
| 7. PrincipalDetails 객체를 이용하여 2가지 로그인 방식 통합 (0) | 2022.02.17 |
|---|---|
| 6. OAuth2 구글 로그인 (0) | 2022.02.17 |
| 4. 로그인 만들기 (0) | 2022.02.16 |
| 3. 회원가입 만들기 (0) | 2022.02.10 |
| 2. 시큐리티 기본설정 (0) | 2022.02.10 |